Asus ROG Ally: How to Select an OS Without External Peripherals
Asus ROG Ally is basically a laptop.
It has the same hardware, just in a uniquely shaped case. This means nothing prevents you from installing different operating systems on your ROG Ally and dual-booting them. However, there is a problem: normally, you would use a boot loader, such as GRUB, to select the operating system you want to boot into. But to actually select an operating system, you will need a USB keyboard attached to your ROG Ally—Bluetooth keyboards won’t work until you boot into an OS.
This means you need either a wired keyboard or a wireless keyboard with a USB receiver, which you must plug into your ROG Ally. At home, this isn’t a big issue, especially if you use a dock with connected peripherals. However, selecting an OS on the go or from the comfort of your couch can be inconvenient. Given that the Ally has enough hardware buttons, one might wonder why they don’t work for OS selection—whereas on a Steam Deck, they do.
Why Steam Deck’s Controls Work for Boot Selection
On a Steam Deck, you can use the D-pad during boot to select an OS in the boot manager. This is because the Steam Deck’s controller has roots in the discontinued Steam Controller, which featured a “lizard mode.” This mode allowed the Steam gamepad and, by extension, the Steam Deck’s controls to act as a USB keyboard when no driver was loaded. Essentially, you could use the D-pad and buttons the same way you would use arrow keys and the Enter key on a regular keyboard.
Unfortunately, the ROG Ally does not have this feature. However, there is a way to select the OS without using an external keyboard.
Entering the BIOS to Select a Bootloader
To do this, you must first enter the BIOS. Since the ROG Ally is a standard PC, it has a BIOS. To access it, follow these steps:
Reboot the console and, as soon as the boot animation appears, press and hold the volume down button.
If the Ally is powered off, turn it on and immediately hold down the volume decrease button.
Sometimes, this process may not work on the first try, but with enough attempts, you’ll get the hang of it.
Once in the BIOS, all buttons and even the touchscreen should work. Occasionally, the buttons or touchscreen may not respond upon entering the BIOS. If this happens, simply press the power button to shut down the ROG Ally and repeat the process. Eventually, they will function properly.
Selecting an OS From the BIOS Boot Menu
In the BIOS, the button legends are mapped to the ROG Ally’s hardware buttons, allowing you to navigate using them. You can also use the D-pad and buttons, or simply tap the touchscreen, to access BIOS features as if using a mouse.
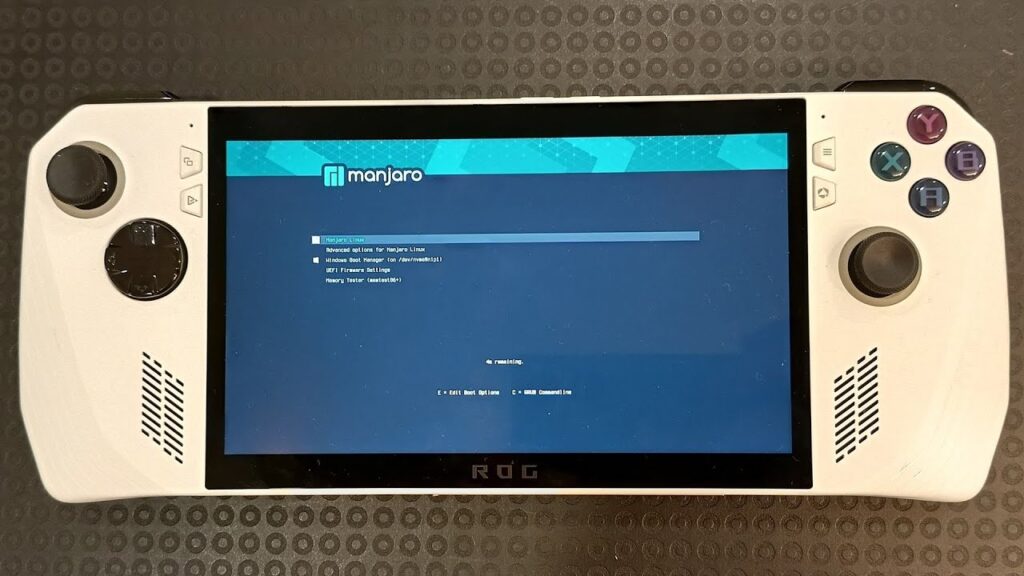
Now, to select an OS, open the boot menu. On my unit, I see three bootloaders:
The standard Windows bootloader
GRUB from my Manjaro Linux installation
rEFInd, a more user-friendly alternative to GRUB
You can use the D-pad and buttons to choose the desired OS from the boot menu. Notably, if you first enter the BIOS, select a bootloader (e.g., GRUB) from the boot menu, and then boot into it, the buttons and touchscreen continue to work. For example:
Booting GRUB from the BIOS boot menu allows you to use the D-pad and buttons to navigate the OS selection.
Booting rEFInd (which has mouse support) lets you use the touchscreen for OS selection.
The Current Limitation
The only drawback of this method is that it is somewhat tedious. Perhaps in the future, Asus will update the BIOS so that the buttons work in bootloaders without requiring a BIOS entry first. Asus frequently releases BIOS updates for the ROG Ally, though they often don’t provide detailed change logs. As of now, however, the only way to ensure functional buttons in a bootloader is to first enter the BIOS and then launch the bootloader from the boot menu.
This workaround may not be ideal, but it is a reliable way to select your OS on the ROG Ally without needing an external keyboard.