Renaming your DJI drone is a simple process that can help personalize your device. Whether you own the DJI Mini 4 Pro or another drone model, the process is mostly the same across different drones and remote controllers from DJI. Here’s how you can rename your drone using the RC2 remote controller, although this method should work for most other models too.
Step-by-Step Guide:
Connect Your Drone to the Remote Controller: Begin by powering on your drone and connecting it to the remote controller. Ensure they are paired and communicating properly.
Open the DJI Go Fly App: Tap on the DJI Go Fly app on your remote controller’s screen to launch the app.
Access Settings: Once you’re in the app, tap the three dots in the upper corner of the screen. This will open the drone settings menu.
Navigate to the ‘About’ Tab: In the settings menu, go to the “About” tab. Here, you’ll find information about your drone, including its current name.
Tap on the Pencil Icon: Next to the drone’s name, you’ll see a pencil icon. Tap this icon to initiate the renaming process.
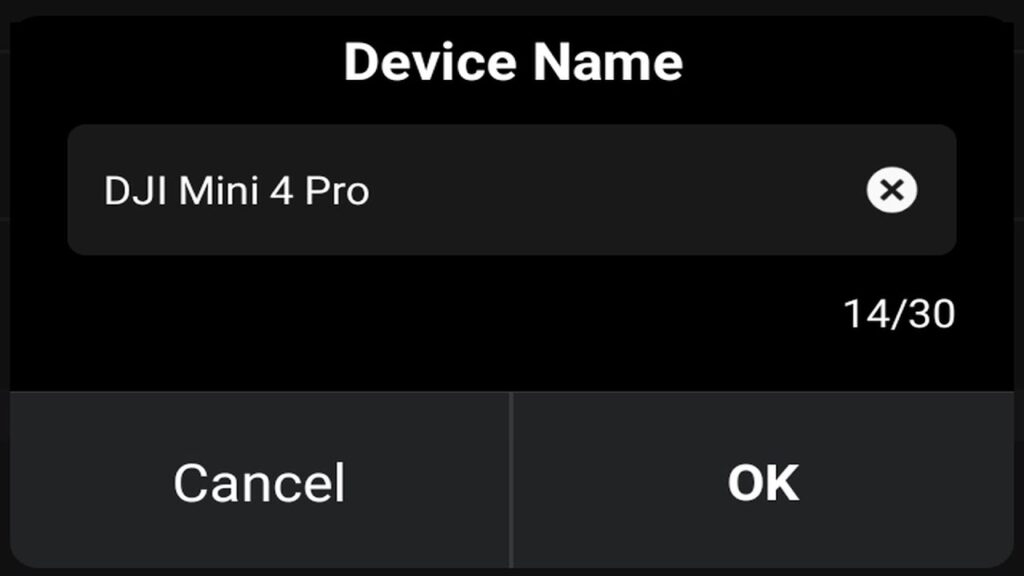
Rename Your Drone: A pop-up will appear with the option to rename your drone. Simply tap on the current device name, and a touchscreen keyboard will appear. Use the keyboard to enter the new name for your drone.
Confirm the New Name: Once you’ve chosen your new name, click “Okay” to confirm. The device will notify you that the name has been successfully modified.
From now on, your drone will be recognized by the new name you’ve given it!
Conclusion:
Renaming your DJI drone is a quick and straightforward process that can make your flying experience feel more personal. Whether you’re looking to make your drone stand out or simply want a name that’s easier to remember, it’s all just a few taps away. Happy flying!