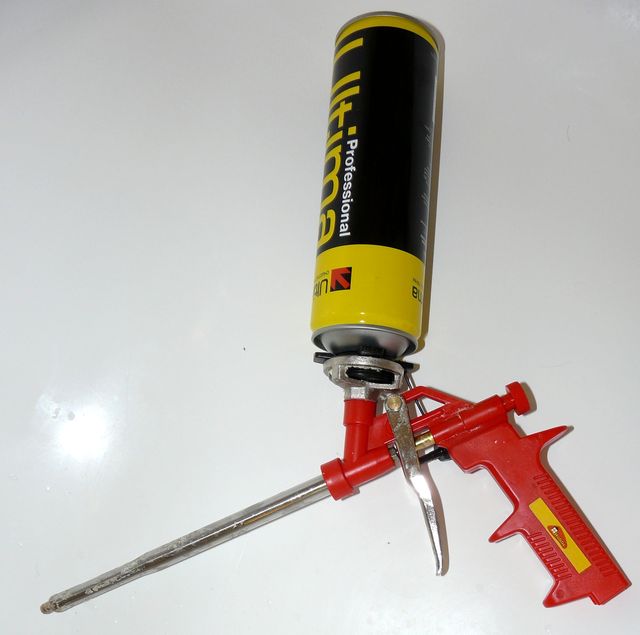
Polyurethane foam is essential in modern construction and repairs: you can find it filling up cracks in the walls, insulating windows and doors, and even underneath your favourite hot tub. A special applicator gun allows to spray polyurethane foam evenly and efficiently.
But what to do if the foam cured inside the applicator gun, and it doesn’t work anymore?
First, a foam gun, like a real gun, should be serviced and clean at all times. Of course, even a stiff foam gun can be cleaned, but this takes time, which could be used on getting the job done. So try to keep your tools fully operational to save your time.
First, do not press on the applicator trigger without a container attached. That will depressurize the insides of the tool, and the air coming in will solidify the foam inside.
Second, do not keep foam inside the applicator for more than two weeks. It means, at least once in 14 days, push the gun trigger for a moment. This will renew the foam inside the gun, and it can be kept for a couple of weeks more.
Third, if you don’t plan to use the foam applicator for a prolonged period of time, get a foam cleaner canister. It is usually smaller than a foam container, and costs a little bit less. Replace the foam container with the cleaner container, and push the trigger until the remaining foam leaves the gun. Now, wait for ten minutes, and push the trigger for a couple of seconds more. The gun is clean now. You may detach the container. However, you may as well keep it attached to the gun, it won’t hurt the applicator.
These simple rules will help you keep your foam applicator gun at arms all the time.
If you still have a gun with cured foam stuck in it, it will require more thorough cleansing.
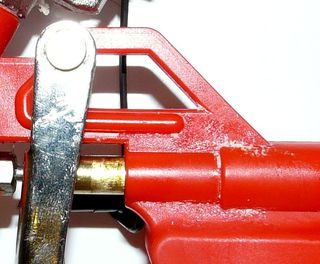
If you can’t pull the trigger, do not apply force! The applicator base is made of very fragile plastic or metal, and is not designed to withstand much stress!
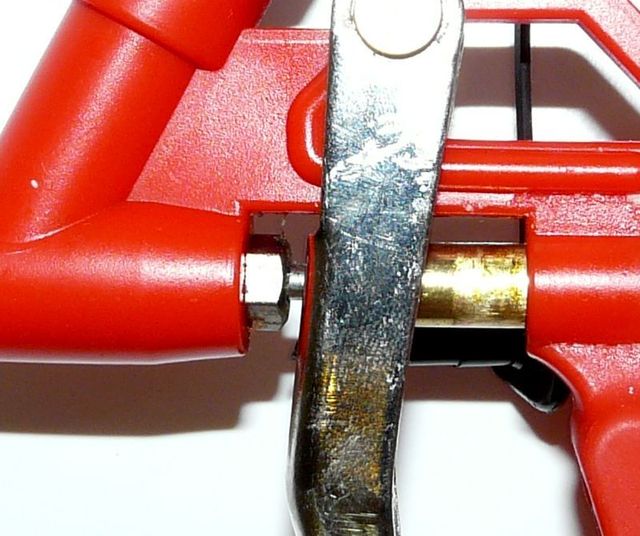
First, cut off the remaining foam from the tip of the gun with a blade. Try not to scratch the center part. Now, apply a drop of nail enamel remover (or any similar solvent).
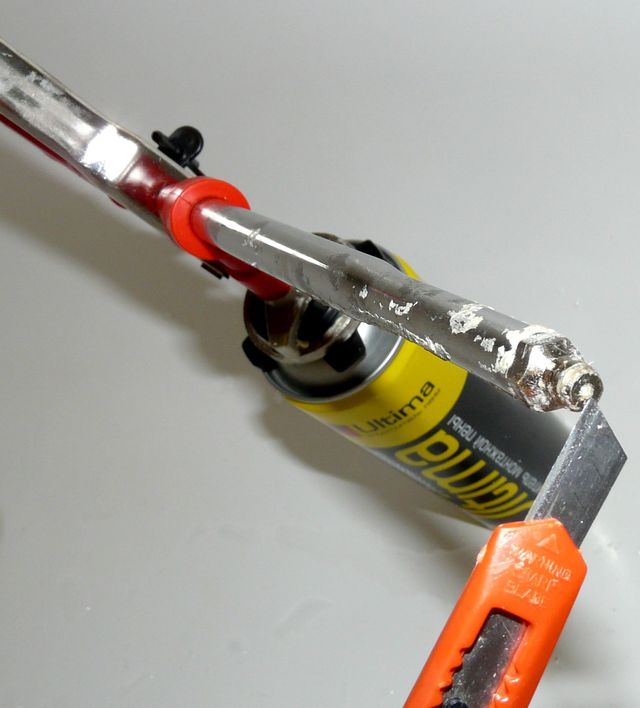
Next, point the gun to the floor and apply a drop of solvent to the metal rod before the trigger. Warning! If solvent gets to the threads of the flow regulator, it will glue the regulator to the gun forever making it unusable! So if you spilled some onto the regulator, unscrew it completely, wash away the solvent and apply a drop of oil. Try not to lose the ball and spring inside in the process.
Pull and release the trigger a little bit, cutting off all the dissolved foam that comes out of the shaft. Repeat until the trigger is moving freely.
Try to cleanse it with the cleaning canister. If nothing happens, the main valve must be cleaned.
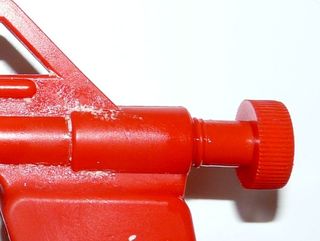
Apply a drop of solvent to the little ball in the canister attachment, then screw in the cleaning canister, wait for ten minutes and try to cleanse the gun. If nothing happens, you have to remove the canister connector.
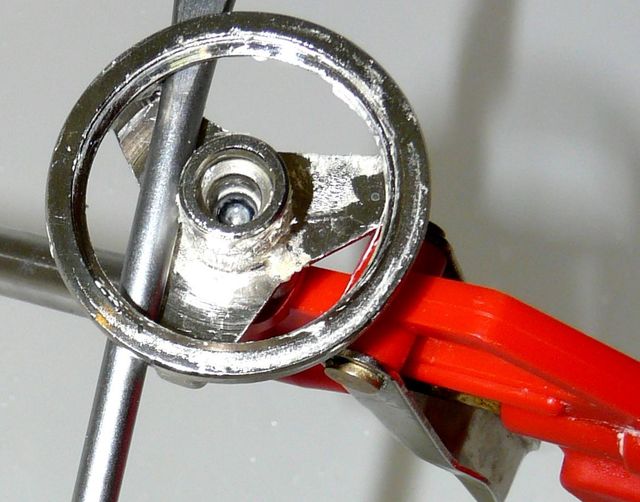
The easiest way to do it is inserting a screwdriver between the crown, and using it as a lever. Hold the gun underneath the connector in the process, overwise you may break the handle.
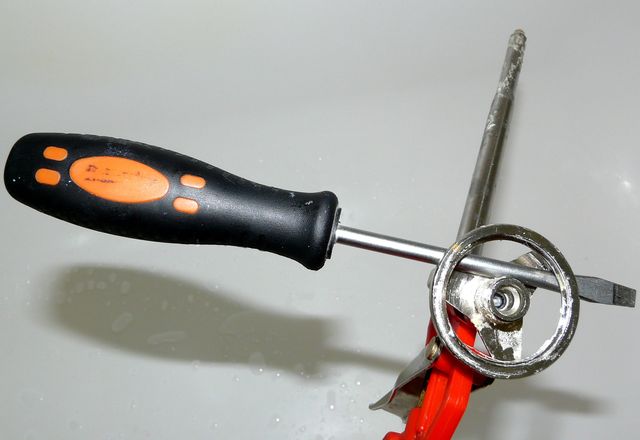
When unscrewed, clean out all the foam with nail enamel remover inside the gun and from the back side of the connector.
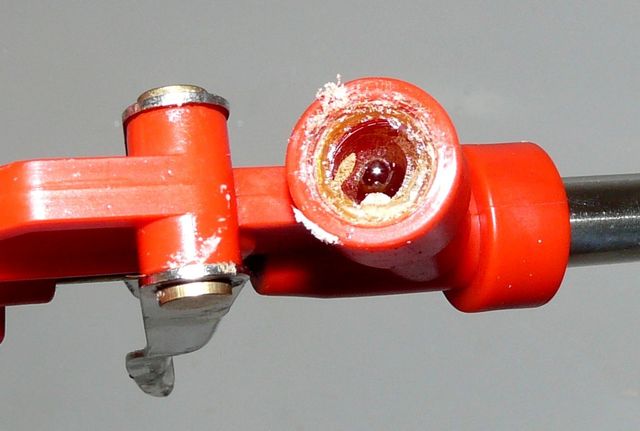

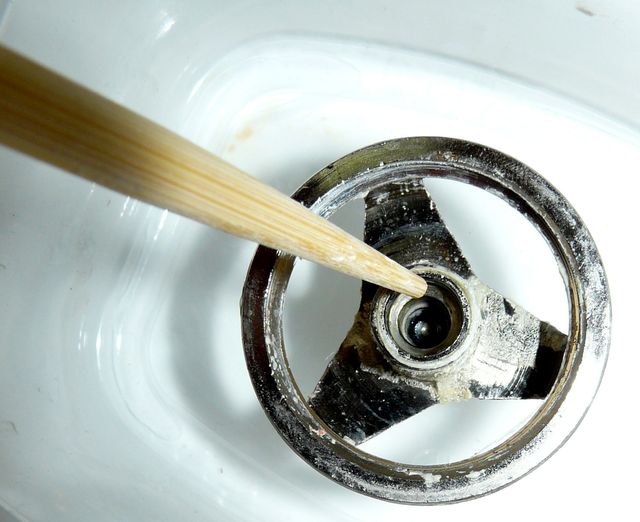
Now, use a wooden stick (a sushi stick will do perfectly) to push the ball from the outside. Apply solvent and push until the valve ball is freely moving. Do not use metal tools! They may scratch or break the ball, making the applicator unusable.
Reassemble the gun, put on the cleansing canister and clean up the gun. Now, screw in a polyurethane foam canister and try to use the gun. Some foam may come out of gun’s joints, but don’t worry. The foam will seal up the connections, and the insides of the applicator will be washed up by the cleansing can, which you should be using regularly from now on.